Hummingbird Commission 4: The Background and the Applique

You would think that the background doesn’t have that much impact on a quilt. Something pretty to showcase your basic image, right?

Not my experience. The background sets several things in place. It sets the time of an image. And each background tells a different story. The images tell you the who and what. The background tells you how, why and where.

Here are the backgrounds we chose preliminarily for this piece.

They’re all good choices. They tell a different story. Is it daytime or night? Is the flower alone, or is it in a garden? Size tells you different things as well. Smaller pieces are more intimate and look more intricate.

Since this is a commission, it’s the owner’s choice. She wanted the soft background with lots of flowers.

I love these oil paint stick rubbings! I usually overstitch them to accentuate the texture. I did that here as well

Lately , with paint stick backgrounds, I’ve been stitching the whole background, rather than applying my image and stitching the background around it. It makes a smoother piece, and it blends in better.

These are stitched from the top with polyester Neon Madeira. Since I’m following the rubbing, I need to have it on top where I can see it.

Buto it’s still worth looking at it from the back. You can see the unstitched part that will be covered by the flower.

Here’s where the flower fits in. I edged the flower with an angled zigzag stitch, echoing the colors I used in the petals.

For the hummingbird, I wanted him to pop. So he got outlined in black. It sounds unoriginal, but black always has more impact and leads to a more defined edge.

We’re ready to back and bind here. Thanks for taking this journey through this quilt with me!

Hummingbird Commission 3: The Flower

Every hummingbird deserves a fine buffet lunch, so this one has a flower of her own. The flower is made from different pink lace sheers, cut into petal shapes and backed with Steam-A-Seam 2.

I love using sheers as flower petals. Petals are, by their nature, translucent. But the sheers need extra support. I use a piece of felt in a color that I won’t mind seeing afterwards.Steam-a-Seam 2 is an excellent glue, but it also stiffens the piece. I also have a piece of Stitch and Tear behind it all.

Steam-a-Seam 2 is a fusible glue sheet backed between 2 pieces of paper. You peel off one side, place your fabric on the glue, and it will stick of its own accord. Then you cut out your shapes. It leaves you with pieces much like color forms. You peel off the other piece of paper and you can place your pieces as you like.

When you’re happy with your placement, you can iron down your pieces. You’ll want a Teflon pressing cloth, because the glue will seep through your piece. Iron thoroughly on a medium-high Steam setting. You can clean the pressing cloth with a ScotchBrite Blue Scrubby for non stick surfaces.

All of that leaves you ready to stitch. I’m working with a zigzag stitch. Each petal needs to be outlined and detailed, but it really doesn’t matter in what order. So I can change the areas by petal so that I’m using different threads from my thread range across the flower.

Why go to the trouble of making the flower into an applique? Because after all that stitching, it’s going to pucker up and want a kiss. Cut off all those stabilizers, and you’ll have a flat and lovely flower for your quilt.

Want to see this completed? You’ll find the whole project on my Patreon Page.

It’s free to join!

Angling for Fish: The Short and Long of It

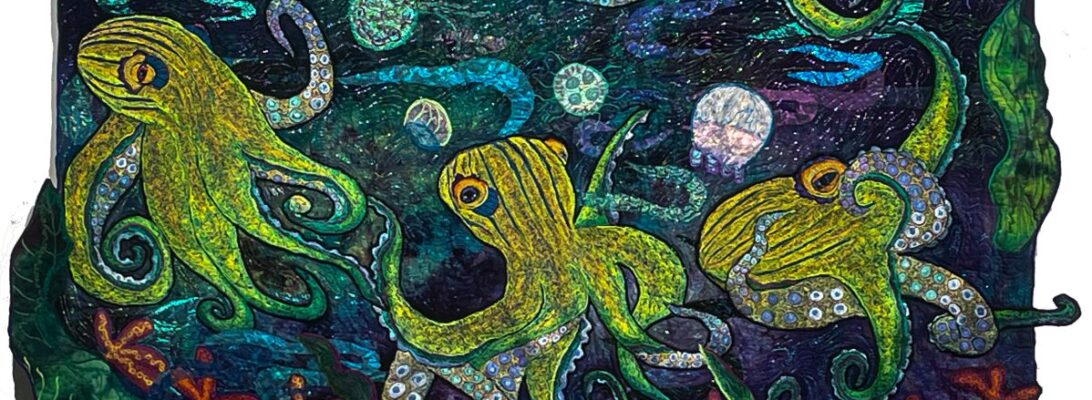
Last week has been spent in fish production. I can’t really put in the octopuses until I have the fish to create the path around them.

Usually, fish have scales, and the scales divide the space..You progress from scale to scale, picking lighter colors as you get to the underbelly. You fill in the scales darker on top and progressing through lighter colors around the belly. It’s pretty. It gives depth.

What if you don’t divide the space? You can stitch row after row of color next to each other. It looks stripy. There’s a place for that, but it’s not very natural.

It doesn’t work for clown fish.They blend from one color through another without separation.

So how do you fill in a larger space? One way is the short and long stitch.

You need to understand that none of this is a stitch on your machine. It’s all zigzag stitching. The change is the angle in which your fabric goes through the machine.

The long and short stitch is done from side to side. The difference that it spreads from both sides and fills in unevenly, shading the area softly and without stripes. The top and bottom of the image has a solid line to outline.

That kind of shading allows us to put in darker contrast colors to shade that blend right in. These fish are shaded with a dark and then a lighter purple. Since the colors are mostly covered with orange thread, your eye blends them into a shaded solid orange.

All of this is for the octopus’s garden. This is my second pin-up. I think it needs one pillar rock and some water, but it’s ready to back, and stitch.

For more information about the long short stitch, check out The Long and Short of It Blending Stitches with the Long Stitch

Avoiding the Easter Bunny Look: Shading with Pastels

Anatomy of a Color Scheme

There’s no help for it. If you are shading a pink bird, you’ll need to use pastels at some point. I’m not a fan. But you don’t get to throw out a section on the color wheel. Eventually, you’ll need all the values: tones, jewels, and pastels. Tones and jewels. Yes! Pastels. not that much.

Let me break down the color scheme for you.

There are six color zones, in the feathers of this bird, and then a zone for the neck and thighs, the feet, the head and the bill.

There are two progressive color themes going on. The pink under body and feathers, and the green overstitching. Both progress from dark to light.

Where did it go wrong? I chose the wrong yellow.

White objects are rarely pure white, unless you want a posterized deco look. They’re made up of other colors pale enough to be perceived as white. The bird itself is pink. I pulled in bits of lavender and yellow to blend it and to create a shadowed projection. I chose the wrong yellow. If you look at the top feather, you can see a strip of yellow that’s pretty loud.

You know that kind of Easterbunny pastel. Yellow, pink, blue, purple, and maybe green. It’s only appealing if you’re under the age of five. It missed here. I stitched some cream and natural white thread all over it.

Then I added the overstitching. The overstitching takes center stage, and the yellower bits back off. I think I’ve saved it. It also browns out the pinks a bit. They’re all there, but quieter for the green.

What should I have done? I should have lined up that yellow in a row with the other colors and taken a black and white picture of it. I would have known right there. But I’m happy with it now.

I’m ready for the next step, which is the background. And I think it needs yellow fish and birds.

Rethinking retooling

This last year has been a disaster for my sewing machines. Most of my work depends on intense embroidery. Lately I’ve depended more and more on that stitchery for my images. I love it. But it does wear and tear on the machines. I had 6 major machine breakdowns. last year. I broke down 3 220s, my 770, my 630 and a 930. Some have fixed. Some have not.

I’m a Bernina girl from way back and have been a Bernina Ambassador for most of my career. I work with Berninas because they are tough and they stitch accurately. That doesn’t mean they don’t break down, Particularly if you’re sewing at speed demon speed for hours on end. I was told this is my fault.

I suppose it is. It’s what I do. I can either back away from this kind of stitching or find another way.

Zigzag embroidery allows for intense detail and color, I can’t step away from it. I also can’t keep breaking machines. So something has to change.

Don is my miracle in this. He’s a wizard with older small motors. He’s not specialized in sewing machines, but very mechanically savvy. He’s collecting manuals and parts machines. As always, he’s my hero.

I really can’t function though without a working machine and I prefer 2 backups. I’m not exa sane without a sewing machine.

Years ago I bought a 20 U Singer for intense embroidery. That’s not what these machines are known for. In a way, they’re the cockroach of the sewing machine world. Not in the sense that they hide under the cupboards, but because they are pretty much unkillable. You find them most often in dry cleaner shops for repairs.

It was a mixed success. This thing eats babies and cats, breaks thread constantly, and is fast—too fast—even with different slower pulleys. And it was the weight of a tiny elephant. When I left Porter, I left it in my studio, where it has sat.

Ken, the person renting my house, offered to bring it to me. That in itself is a huge glft But I’ve had my reservations about making this machine work. I first felt I was stepping backward, Is it an answer to the same problem? Is this machine tough enough?

Well, we know it’s tough. Can we make it work with embroidery thread? There’s the question. It’s also paid for.

It had its problems before. But things have changed. I now use stronger threads. I no longer work in a hoop. And we found that a servo motor would step down the speed. So it’s coming to the studio sometime this month, and we try it out. I’ve gone from feeling like I’m stepping back to seeing new possibilities.

You can’t step in the same river twice. You are different and the water is different.

I’m digging out the studio this week to make room, which is why I don’t have new work to show you. I’ll let you know what happens next.

Wish me luck. I think it’s time for another spoonbill.

Gilding the Lily: Adorning Fabric Rubbings

A couple of weeks ago, I did a series of small rubbing pieces. I use rubbing plates and oil paint stick. I focused on different backgrounds, flowers, bees, dragonflies and butterflies. It’s an endless river of design choices in a tiny scale.

I’ve loved working with tiny pieces. It’s nice to have a quick result, and they’ve proved to be popular. Who wouldn’t want a delightful piece of art that fits everywhere and doesn’t cost much.

The rubbing plates I’ve been using are a limit of sorts. I still haven’t figured out how to make my own. I will. I want it bad enough, I’ll do it.

But I’ve enjoyed working with these flower plates to stretch what they might be.

But there’s another side. It’s soothing to spend a couple days just stitching. The rhythm of the machine, the movement of design, and the feeling of watch thread flow from the needle to the fabric all create a tao that’s gotten me through endless tough times. Demanding focus to actually color in the lines is very good for me. A lot of my stitching can be mindless. This is not. I have to try to hit the line.

I’m going to show you some of these before and after I’ve stitched them. It’s a magical change that always thrills me.

They are transformed by stitching. They’re lovely, just as fabric rubbings but they change in amazing ways, once they’ve been stitched.

These are supposed to be waterlilies. But with some background and color changes, I think they make fine Dahlias.

These are supposed to be forget me nots.

But I love them as carnations

But there’s another side. It’s a place to explore and work with colors differently and stitches differently. Not endless change, but small differences not tried before. Is there anything I haven’t tried. Of course there is. Move it over a quarter of an inch and add peach, and I’ll bet I’ve never done it before.

I’ll be finishing these little quilts in a day or two, and they’ll go up on the website and onto Etsy for sale. You’ll find tutorials on rubbings and stitching on the video page.

Take time to try things out in little ways or big ones, as your work needs. It feels great to stretch a bit.

Going with the Flow: Using Hand Dyed Fabric to Design Your Stipple

I’m a big fan of hand dye. Like most things in art, it’s definative. You can tell who has dyed the fabric if you know their work enough. I’ve dyed my own fabric since I was 10 in some way or another.

for a long time I’ve used a sponge dyeing technique. I mix a number of dyes (30-60 colors) and sponge them one by one onto the cloth. It gives me a spectacular color range, but it is never predictable. Which means each quilt I make starts with an unique piece of fabric.

There are always occlusions and patterns within hand dye. Most of them are formed by the way the fabric goes into the plastic bag to cure. I usually focus on the flow of the colors in the design.

This time I really couldn’t. The background was so magnificent that I stippled it following the hand dye itself.

All metallic threads are more fragile than polyester or rayon. You always get more breakage if you put it in the top of your machine instead of the bobbin. Top thread goes through the needle 50 times before it lands in the fabric, Bobbin thread just gets pulled up once.

You can stitch the whole thing in poly or monofilament from the top and then restitch with metallic. I don’t like the texture from that. Too thick. And you can see that top thread under the metallic.

I’d rubbed oil paint stick over a ceiling tile to make the reeds in this piece. They were simple. I followed the paint marks with Poly Neon in matching colors.

The sky was not as easy as it sounds. I used a Madeira Supertwist thread for the stitching. It’s a beautiful metallic and stronger than most. But to follow the pattern in the cloth, I had to stitch from the top..

So I stitched from the top with a 90 Topstitch needle, endured endless thread breakage and went through a bottle of Sewer’s Aid. I think it was worth it.

Would I do it again? What wouldn’t I do for my art? If it needs it, that’s what we do.

I make my hand dyed fabric available for students and artists on Etsy. For more information check out Hand Dyed Fabric for Sale ir my Etsy Shop

Bobbin Management: When the Dead Dead Bobbin Goes Bob bob Bobbing Along

For those of us who use bobbin work, there is always the quest for empty bobbins. For every color of thread I use, I need a bobbin with that color of thread.

So it’s no surprise when I get a new kind of machine, I usually buy 200 new bobbins for the machine.

Unfortunately, bobbins cost more. My Bernina 770 uses a $5 bobbin. They are pricy. But truly, like being too rich or too thin, there are never enough.

Thread is pricey too. It won’t go back on the spool. So you either use it up or pull it off the bobbin and waste it.

So when I went to do a run of minnows, I looked at my bobbin box and made a plan.

I didn’t want the fish to be in any way identical. That’s not the nature of nature. Nature is endlessly variable. So I decided on green fish and yellow fish, and planned to empty each yellow or green bobbin dark to light, top to bottom.

The fish I’d drawn had cross hatched details. I lined up my bobbin colors and made a progression of colors square by square, dark to light. I think I filled 4 bobbins for the whole batch. How many did I empty? The empty bobbin count at the end was 16.

Here’s the finished fish. Because I wasn’t micromanaging the colors, they clash a little and contrast not only in color but in tempurature. Which makes them shimmer a bit. Like fish.

My dad would have been pleased to make that catch. And I have enough empty bobbins to tackle the birds next.

Finding a Path: The Way You Stitch Matters

I’ve been working on a koi fish quilt for a while. I wanted those heavily scaled koi with repetitive black background under orange-red scales. If it sounds easy, I’m saying it wrong.

This is a zoning issue. You have a black zone and a colored scale zone. They need to be crisply separated.

The gold standard approach is to make each scale separately, tie them off, and start the next one. By one. By one.

It does make a nice separation. It also asks the question, “How long do you expect to live?” It takes forever.

The other answer is to do one zone at a time and find a pathway through your stitching that makes the least mess getting from one spot to another. You need to find a stitching pattern.

It’s different every time. You want to cover the areas where you’re moving from one square to another with the smallest, least visible stitch.

What works best is the stitch moving your zigzag directly out from the side. You’ll get a straight line that later can be covered over. Or if it’s tiny enough, ignored.

I chose to take black thread afterward and clean up the image. This is half fixed, half not. I’m sure you can see the difference.

It’s always simpler to blend colors. But sometimes what you want is that crisp distinction between zones.