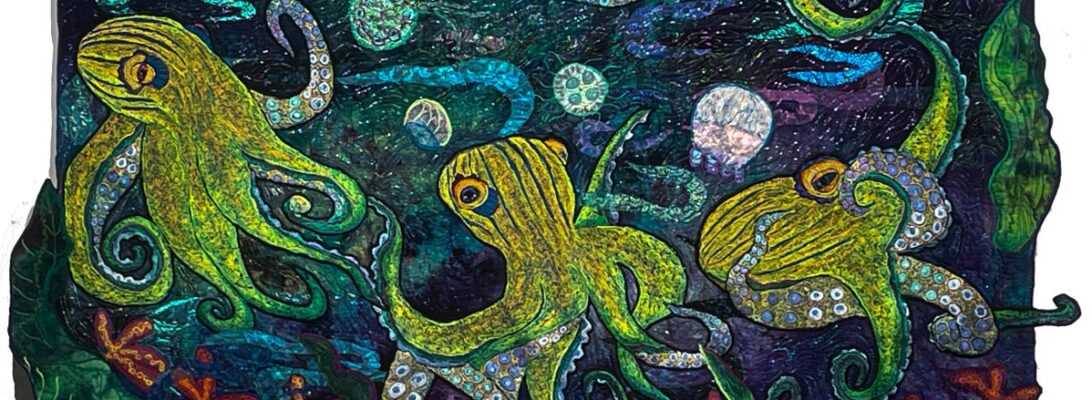
Nothing Exceeds Like Excess

Nothing Exceeds Like Excess

962-21 Queen Bee

I’m not the sort of person who does things half way. I’m just not built that way. So when I did a little experiment with some oil stick rubbed fabric, it sort of got out of hand. I had a handful of some smallish scraps and tried some straight stitching with 40 weight metallic in a manner I hadn’t used for a while. I spent about a week on it and found myself with a good dozen little quilts.

They were also experimental in the sense that they’re smaller than I usually work. Tiny. We’ve talked about working in different sizes. Size is actually about your art filling the space where it lives. Intricate small art fills small places. Large art tends to lose the intimacy of tiny work.

Small work fills in differently. Attaches to the eye differently. But there is another nice thing about small work. It can sell for a lot less money.

Which is a good idea right now. Remember that thing about me not being able to do things half way? Two weeks ago, I found an old Elna Supermatic green sewing machine.

Actually I found 2. One perhaps for parts. I’m a Bernina girl from way back. I love the stitches on the Bernina. But the old Elna has a different bobbin mechanism that’s set up to adjust for thick thread.

Remember that large pile of #10 pearl cotton I dyed up? That kind of thick thread. Don needs to do some repair on them, but I can’t wait.

Which is how I find myself needing to catch up after having bought two older sewing machines out of budget. So the new quilts are going on sale, to help me catch up.

I’ll have all my work at my Etsy Shop on sale for 20 percent off for a month. If you’ve wanted a quilt, this might be your moment. And there’s new experimental stuff I think you’ll enjoy seeing. Do let me know what you think. It’s not like I can really do anything by half.

Large Quilt or Small Quilt: Does Size Matter?

I’ve spent the last year rebuilding my body of work. When I married Don, I had perhaps maybe 40-50 quilts in house depending on how old the quilts are you are showing. For the first three years my occupation here was mostly in figuring out how to live around another human being. Then I had knees redone. Three actually. You can need to have to have a knee done twice. Don gave me his house as a studio a year and a half ago. All of a sudden I’m working again on a daily basis. It’s good for me. It’s good for my heart and soul.

So I’ve been experimenting for my own pleasure, but I’ve also been working towards having enough work to show. I don’t intend to teach on the road again, but I do love showing my work. And since it doesn’t necessarily fit into the standard quilt show, I’ve always sought out sole artist shows.

That means having a full body of work. Your standard one person quilt show in a small gallery is probably 12-20 quilts depending on the size of the gallery and the size of the quilts.

Five years of not producing work doesn’t sound like the quilts would disappear. But they did. Some sold. Some got given. We went from around 50 to 15.

The size of an art quilt is about the space it fills. If it’s in a large gallery or show, it needs to be the size of God’s underwear. If it’s for a small space, it needs to fill the space appropriately to make itself known. It should at either size, change the energy of the space by it’s presence.

So this last year and a half has been a building up of work. I love doing the little pieces. They’re light and fun and full of experimentation. I’ve always loved them.

I’ve always loved doing the visual paths. They’re elongated universes designed to take your eye through a trip They make a huge statement without being huge and they fill a space in a unique way.

But big quilts. Big quilts take for ever. Big quilts are always a huge risk. They are hard , hard work. And they’re made to be show stoppers. As in, if you want a show, be prepared to make a mountain of these. Or your sort of stopped.

They usually take 9 months to a year, although I don’t work on them constantly. If they are disappointing when you finish, it’s a huge loss of time and energy.

I’ve never found that I could take a small design and blow it up large. The space fills in differently if you do that, and it’s hard to make something that’s interesting both as close up and at a distance.

Obviously it’s a matter of balance. Most people have a size in their head that is comfortable, and that’s as big or small as they go. But it’s worth working past your comfort.

Does size matter? Yes and no. Size makes impact. It makes a statement. It makes legend work.

But small work, intricate work makes a small space resonate with it’s energy. It’s worth doing it all, as best as you can. The stretch either way is good for you.

Thread Colors to Dye For: How To Dye Threads for Shading

I’m obsessed with thread shading. I want images to be as 3-d as possible. To do that I shade with as many colors as I can. With regular #40 embroidery thread, I can use almost an infinite number of colors to shade an image. Particularly for a larger image. It’s a pretty large paint box. And you can use them all.

With heavy weight bobbin threads, there’s just not that much space in an image to shade. So this is my answer. Instead of adding more and more colors, I dye the thread so that it’s got a range of color within each thread.

Most commercially dyed thread comes in one of two styles. Either they mix a dark color with a number of lighter shades ending in white. Or they do the rainbow either in pastels or brights. The rainbow color ones work for stippling. They don’t shade well at all. The ones with dark to white leave a white area I really don’t like.

Most images can be zoned in dark, medium and light areas. They also can be zoned into different colors, like the spots and the frog’s body.

Dyeing threads to shade images can be set up the same way. You can dye a shader, a shocker and a smoother. The shader thread is the color of your image darker than you want the whole image to be. Add in a dark shading color like dark brown, purple, green or blue, or it’s complement, plus 4-6 dark shades of the whole color. The shocker is a medium range of 5-6 colors with a shocking color mixed into it. Usually a bright complementer color works best as a shocker. The smoother is a color that is a bright highlighter shade that fills in the image and finishes in the shaded image.

The range of colors gives you at least a 15-18 color range in a small bobbin work image. Other colors can be added. There are no rules, but here are some color ranges that work well.

Shader: Dark orange, yellows and reds, and browns

Shocker: Yellows and two purples

Smoother: Yellows and oranges

Shader: Dark purples, blues and greys

Shocker: Medium greys and teals

Smoother: Medium to light purples

Shader: Teals, and oranges

Shocker: Yellows and teals

Smoother: Yellows, and oranges

You get the idea. Dye the thread to do your shading for you. As you fill in the stitching with rhythmic motions, the shading progresses across the image. All you have to do for thread like that is dye for it.

Toad Away: An Extravaganza of Toads

Mother Toad

Last week I was balling up the #10 pearl cottons I dyed. This week I pulled out a bunch of frog drawings and put them to the test.

Why frogs? I wish I could answer. I have some pat answers that really don’t cover it all. Mostly because they’re images that resonate for me.

I was talking with a friend about whether she should restrict the things she writes about. I don’t know that everyone needs to see everything. But I don’t think that kind of restraint is good for the creative process. If an image or an idea haunts me, I think I ought to pay attention. And work with it.

So that’s what I do. I keep on the images that call my name and tug at my sleeve. I can’t tell you why. I only know they’re important to me.

I took a number of frog drawings and worked them in a mix of #10 -#8 pearl cotton. But it was a great moment to play with more frogs.

What happens when we rework images? I believe we rework ourselves. Our place in the world. Our vision of it. The part of us that keeps us green and growing.

I don’t know or believe that we need to have reasons or purposes. We need to follow our art where it takes us.

Topsy Turvy: The Wonders of Thick Thread: Bobbin Work Part Two

Thick metallic thread and pearl cotton bobbin work make up the heron

Do you like instant gratification? But of course! Using thick thread in the bobbin is showy, exciting and quick as machine embroidery goes. It’s one of my favorite techniques.

Bobbin work is the only way I know to free motion with thick threads. I’m defining thick threads as #3-8 threads. What those numbers mean is that if you put 8 threads side by side, they would make an inch. This is what thread count means.

adjusting a bobbin case

Thick threads can’t fit through the needle. They do fit easily in an adjusted or bypassed bobbin case. How do you know what kind of machine you have. If you open up your bobbin and it’s in a little silver housing that comes out of the machine, that’s a bobbin case. For thick thread, you loosen the bobbin case by turning the screw about 3/4 of a turn to the left. It’s best to have a separate bobbin case for the purposes. Bobbin cases get old, so it’s never a bad idea to buy a fresh one and make your new bobbin case your true bobbin case. Mark the old one with nail polish, and keep it just for thick thread.

If your bobbin just drops into a housing in your machine, it can be bypassed. You simply don’t put it into tension. No need to adjust anything.

I tend to keep extra bobbins to hold and store thread I’ve wound off. One bobbin per thread. If I don’t use it for one project, I’m bound to use it for another.

Never wind a bobbin on top of thread on the bobbin. It messes terribly with your tension.

I usually stitch on a similar fabric to the background, or one that matches the color of the embroidery. Don’t fool yourself. IT WILL SHOW!

a different frog, zoned

Your image is always backwards. Think of it as a slide. You can see it through either side. I use Totally Stable as my patterns, drawn with marker. It irons on but the excess will tear away.

Stitching in a creature is like coloring with different crayons. I pick black as my outline, and then I zone my drawing. On this frog, there’s a tummy zone, a stripe zone, an eye zone, and the basic body.

I choose my darkest thread in that zone first, the color I want to be dominate. I add a shader color, usually purple, brown or a complement to the color. Then I go through a range of the color, dark to light, and add a shocker color, usually the complement right before the last lightest color.

eye colors in sliver

The eye is always done in sliver thread so it’s shiny and wet. I use black for the pupil, an iris color, and iridescent white for the spark.

Eye

Here’s a progression of stitching and thread on this frog

Some basic things about thick thread bobbin work:

Only work with a straight stitch: Zigzag stitching tends to sew your piece to your needle plate and jam your machine.

When you fill in your stitching, remember that the thick thread fills up more space than the thinner thread on top. Leave a little space.

Pick a #40 weight embroidery thread for the top thread. I like polyester, for it’s strength. You should either match the color to your bobbin thread, or like the mix of them together. You will see both on the front of your piece.

New project, new needle! New day, new needle! I use #90 topstitching needles because they’re strong and have a large eye that reduces thread breakage.

Midnight Stroll

I could stitch directly into my top as well. It integrates better into the background, but it tends to distort things. If an image is under three inches square, I may well embroider right on the surface.

frog cut out and ready to go

But if it’s a big enough image, It’s better done on a separate sandwich of felt, Tear Away, Totally Stable and suitable hand dye to match. It can be appliqued onto the surface and will look like it belongs perfectly

Don’t be afraid to be upside down. Bobbin work makes the most impressive images quickly and easily.

Setting Up Shimmer: Moving Color Across the Quilt

Stippling with flecked metallic

The natural world is full of shimmer. Shimmer is about the change of color, and the change of light. The nature of nature is variance.

How can we create that? How do we build a world inside our art? How do we create the illusion of shimmer and light?

Here are several good ways to accomplish that.

Owl at Sunset process shots.

Hand dyed fabric itself establishes the play of color that nature features. But it’s a soft finish and a soft shimmer. It gives the background of shifting color, and a good glow, but it doesn’t catch the light.

Another way is to put sheers in layers over the the hand dye. It changes the color without losing the fabric beneath it. It shifts the shade underneath and adds texture.

I know some people don’t like the idea of the stipple. But stippling creates more texture and plays against the surface of the quilt. Particularly if your threads shine.

I’ve always found it helpful to separate the kinds of threads I use for field and ground. Different threads offer difference in the shine of the surface. Having a different shine for water, for air, for sunlight, and for your creatures helps your eye to sort those out from each other.

There are three kinds of metallic thread that offer different levels of shine.

Madeira Supertwist Metallic Thread

Fish done in flecked metallic

The soft sheen of Madeira Supertwist gives the fish a scale like sheen that is totally different from either the sliver or the thick metallic threads. That sheen separates the fish from the background, the field from the ground.

Sliver like threads
Stippling with sliver

Sliver, Glimmer, and other flat metallic threads are the most shiny. They look like Christmas tinsel. They come in a myriad of colors, particularly if you are willing to mix different brands. There’s no problem doing that.

YLI Candlelight, Madeira Glamour and Superior Razzle Dazzle are # 8 weight heavier metallic threads. Again, the company brands can be easily used together. These threads have a thick chunky look that is strong and works with rhythmic stitching as beautiful running water. Stitching through a range of color accentuates the light and shadow within the piece. It’s not quite as shiny as sliver, but it makes a strong statement.

You can see the separation between the air and the water in the changes between sliver and thick metallic.

Both sliver threads and thick threads should be used in the bobbin only.

I use all of these threads to make light shimmer across my quilt. And I choose a full range of colors to pull the eye across the surface. And to make the eye track the differences between field and ground by the amount of shine in the threads.

After the Disaster: When It All Goes Wrong

I like to think I know what I’m doing in my studio. I do know better.

Every so often something happens that just can’t be helped. Sometimes it ruins a perfectly good piece. Sometimes it transforms it.

I’ve been working on this piece for over six months. It’s taken time because it’s so large. Smaller pieces are easy to see, easy to feel secure about, easy to finish. Larger pieces take time.

I was having a problem with the moon. The Angelina fiber hadn’t fused well, and I was having trouble stitching it down. So I laid a corn starch stabilizer over it and stitched it down. It was fine until I poured water on it to dissolve the stabilizer.

I hung it up to dry. I didn’t realized what had happened until I had looked at it for some while the next day. There’s really only one Procion dye that bleeds after it’s washed out. Fuchsia is the stuck pig of the dye world. Dyes mixed with fuchsia also can bleed. Almost everything else is dye fast after it’s washed out. But there was fuchsia in the background.

original owl
owl with bleed

It bled. It bled into the owl stitching itself. I bled too. Then I figured it out. The sunset was now in the owl’s face and wings.

I’ve always argued that art has a life of it’s own. It lives past the artist. It is shown places the artist can’t go, does things an artist can’t do. And it has it’s own problems.

Sometimes life changes a piece. It’s has it’s own life.

I’ve decided that the bleeding is like sunset, coloring the stitching as light colors life. Is it what I planned. No. It’s what happened. But I suspect it’s a good thing. And it’s simply what has happened. It’s not finished yet. But it has been changed.

I considered telling no one. But I’ve always been honest about my work, warts and all. I actually think I’m pleased with it.

Another Fine Mess: Globbing: What’s on Your Floor?

‘

Dragonflyl Mountain

What’s on my studio floor? Thread! I collect large wads of thread ends. It’s just what happens when you’re embroidering by machine. It’s everywhere, but it pools it places on the floor. It is pretty It seems like a waste, but like most things, it doesn’t have to be.

Threads

Let’s be clear about this. You can save all your thread ends, if you want. But they aren’t all the same. The threads you sewed your jeans with are probably not going to be pretty in an art quilt, unless you want a pretty rough looking texture. I save thread ends that are either poly or rayon, or more wonderfully thick#8 metallic like Candelight, Razzel Dazzel or Glamour. Or Sliver like threads. For me, this is all about the shine.

Nesting Ladies

What does that do for your quilt? It makes a floor of it’s own. Nature is messy. There’s all kinds of bits of things, on the forest floor, or at the bottom of a pond. A nice blob of thread looks a lot like that. It puts in a bottom without a hard line.

So you have this wonderful glob of thread. It’s pretty. You want it on your quilt. How are you going to stick it on?

Angelina moon

You can glue it. Steam a Seam will hold it down. You can trap in angelina fiber. It’s a beautiful addition to a moon.

You still have to stitch it down. If you try to just stitch it down with a darning foot, it will trap your foot and make you crazy. It makes me crazy.

My best answer is to put something over it. Some folk use tulle. It dulls the colors. I prefer using a corn starch film, like Aquafilm or Solvy. I pin it over the glob, and stitch it down. When you’re finished, spritz it with water until it disappears. Problem solved.

Hunters Moon 2

Globbing makes a beautiful addition to a quilt. And it uses up all that pretty thread.

The Miracle of Cheesecloth: Not Just for Turkey Anymore

I love sheers! I love the ability to have my background peak through the sheers to create the connection between background and an object.

But most sheers don’t paint or dye well. They are poly or nylon. They come in bright colors, but they have other problems. You can paint them in pastels. They don’t dye with fiber reactive dyes at all. And if you get your iron temperature wrong, they melt.

But cheesecloth does all that well! It’s all cotton, and woven loosely. And you can iron it on fry and it behaves like cotton.

You know cheesecloth. You just aren’t used to it in the sewing room. It’s an airy woven cotton people used to use to make cheese (hence the name). Or on turkies to keep the breast moist. You may have used it to make Halloween ghosts or Christmas angels.

But dyed, it can be any color in the universe. I include it in a regular dye batch and it dyes like a champ with fiber reactive dyes. And it washes out easily in your regular washer in a nylon lingerie bag.

It makes amazing leaves! The weave in the cheesecloth looks like the cells of the leaves and the stitching defines the color.

My favorite thing to do with cheesecloth is to make mushrooms. Child of the 60s that I am, they are a flora that fascinates me. And they are an excuse for eye popping color

I do make them in batches. I’ll line up a set of mushrooms on a piece of felt, using Steam a Seam 2, pull out my brightest polyester embroidery thread and stitch up batches of mushrooms at a time, that I’ll use in many different quilts. The bright colors and zigzag stitch pop the the colors to a peak intensity. Now, who doesn’t want that?

What I did differently, is I made some smaller ones for pins and patches for my friend, Sherrill Newman who owns the South Shore Market in Porter, Indiana.

I almost never make these available to people except as finished quilts. But she talked me into it. I made a small batch for her store. Some of the left overs I’ve put on sale on Etsy. They have pins backs on them, but if you wished to use them as a patch, it would be a matter of a moment to remove that with a seam ripper.

Hand dyed cheesecloth might just be the sheer you’ve been longing for. Bright, cotton, and beautifully texturized, it makes great flowers, leaves and ‘shrooms.